Showing posts with label craft swaps. Show all posts

Wednesday, October 22, 2014

Halloween Countdown: Gypsy Fortune Teller

Today I'm sharing the last piece I made for the 13 Days of Halloween swap.  I was very proud that I made 12 out of the 13 things I sent to my partner.  So last but not least, I embroidered this pillow of a lovely fortune teller.
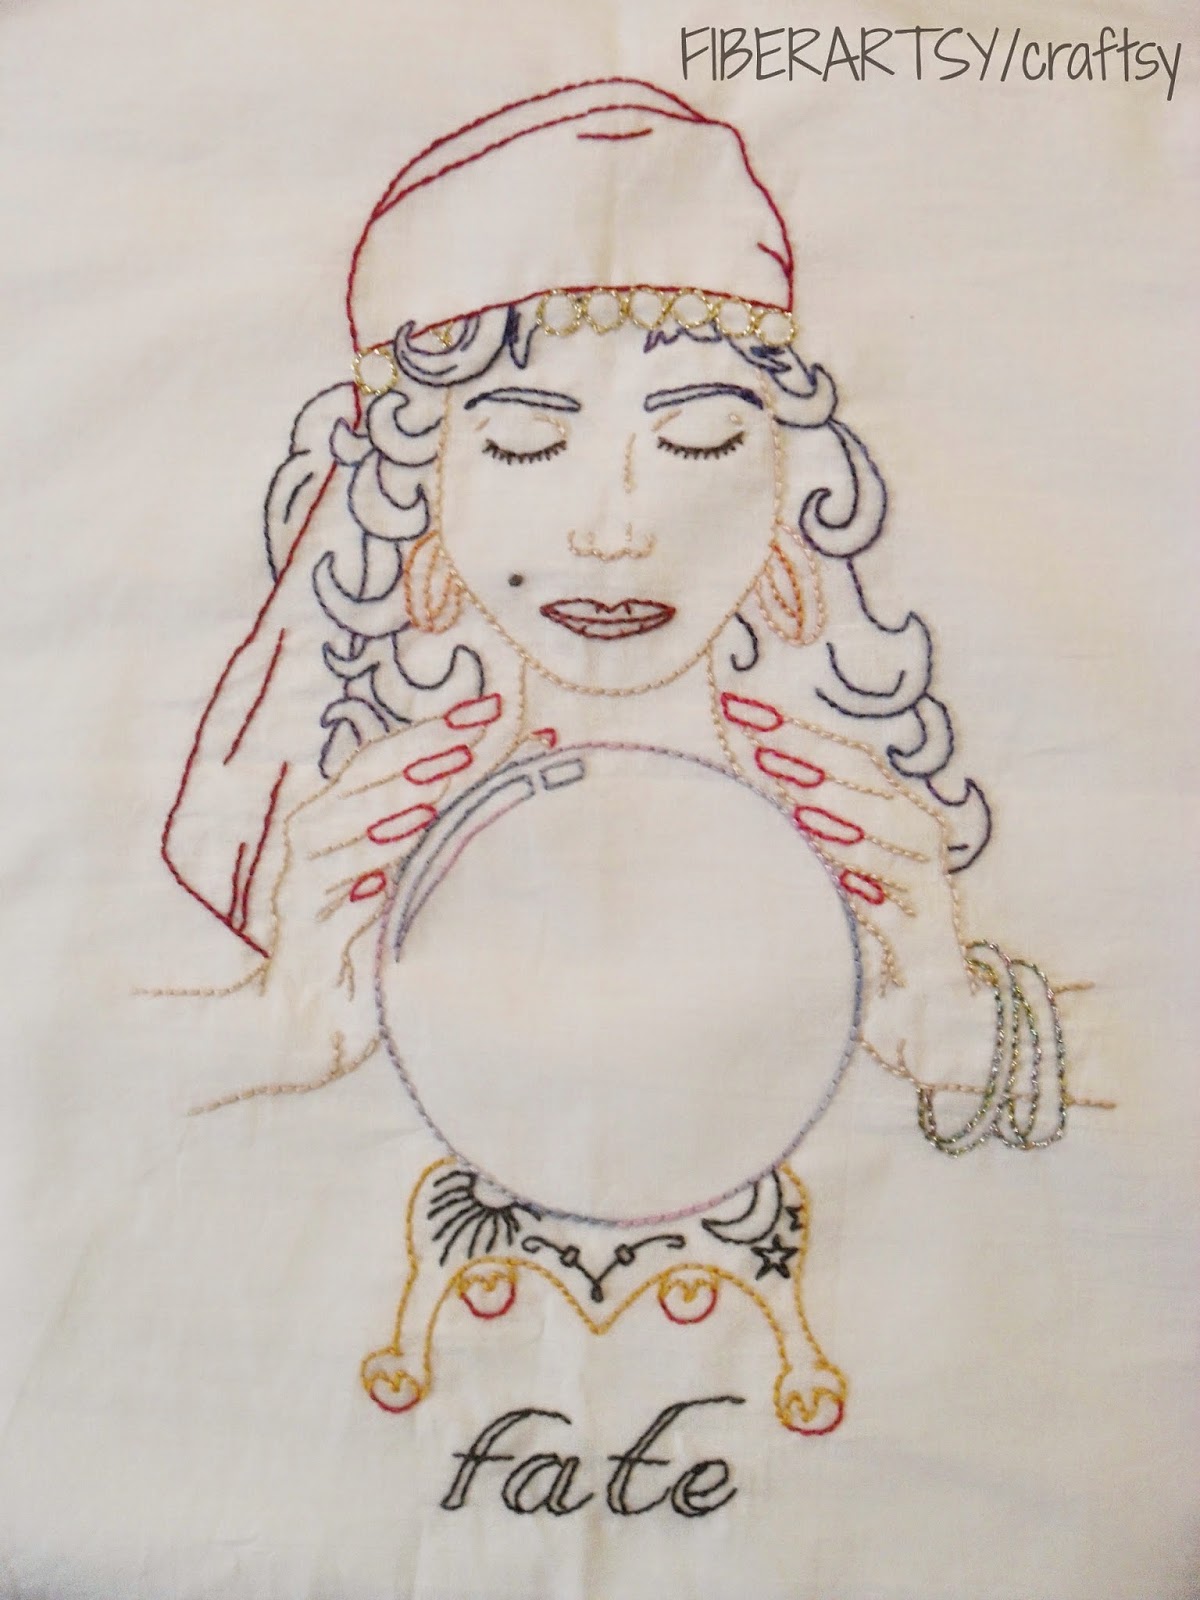

You can find the pattern here, part of the Gypsy Magic pattern set from Colonial Patterns. It's a gorgeous pattern and was fun to stitch.  


I used a pretty variegated floss for her hair.  It has dark blues and purples.  


I used a multi-colored metallic for her bracelets.  It really sparkles!

I loved the little sun, moon and stars on the crystal ball pedestal.  A nice touch.


I'm so pleased with how she turned out.  The pattern has such wonderful details and it was fun to pick out different threads including variegated and metallics. She can tell my fortune any time!

Tuesday, October 21, 2014

Halloween Countdown: Witchy Tea Thyme

Hi all!  I'm back with another finished cross stitch piece!  I made this for my pal Lisa for a little Halloween swap! She's a tea lover and in looking through my patterns and magazines I came across this one and just knew it was perfect!


The pattern is 'Witchy Tea Thyme' by The Primitive Hare and you can find it in this year's Just Cross Stitch Halloween edition.   Look at those ladies drinking tea and eating cake!  How fun.  I love it and it was fun to stitch it.


They are having a grand 'ol time!


I used DMC 4126 instead of what the pattern called for.  It's a lovely variegated with yellow, orange and green that I think looks great and brightens up the black so well.


So another finish!  I'm feeling very good about the things I've completed lately, particularly the cross stitch pieces.  They take such a long time, I get a real sense of accomplishment when I finish a large piece. 

 I hope you're getting in the Halloween mood!  Just over a week to go to get your spook on!

Friday, October 17, 2014

Halloween Countdown: Vintage Cat Cross Stitch

Today I’m sharing a cross stitched ornament that I made for the OTT Ocotber Holidays swap. My fab partner had a lot of vintage black cats in her faves so I thought that would be the perfect thing to make for her.   I remembered that I had a cross stitch pattern in my stash with a black cat image so I dug through my stuff and found it and it was perfect!  It was a small pattern which fit the requirements of the OTT swap, OTT meaning One Tiny Thing.


The pattern is another thrift store score and is made by Stitches from the Heartland and I stitched it on some scrap linen I had. I decided to turn it into an ornament.  It was a fun, quick stitch and my partner seemed to really like it. 

 
I’m doing one more Halloween swap and then I hope to be able to finish the two WIPs I’ve been working on: Primitive Hare’s “Early Witches” and The Frosted Pumpkin Stitchery’s “Halloween Town.”  I may not finish by Halloween but that’s ok.  There’s all year to work on Halloween stitching!   But I would like to finish Gingerbread lane in time for Christmas, so we’ll see!  

Thursday, October 16, 2014

Halloween Countdown: Frankenstein Cross Stitch

I have been wanting to share this cross stitch with you all for SOOOO long now!!  That’s how much I love it.  Once again, I made this for my partner in the Mini 13 Days of Halloween Swap on Craftster. She’s a big Frankenstein fan so I knew I wanted to stitch some sort of Frankenstein for her so I dug through my stash of cross stitch booklets and patterns and decided on this one.  


 It’s from Stoney Creek Collection’s “Witches Stitches” booklet # 284 and the pattern itself is titled “Hello Monsters”.  The pattern also had a haunted tree, a jack-o-lantern and the words Hello Monsters.  It’s a seriously huge pattern.  I only stitched the Frank part and he took so long that I can’t imagine stitching the whole pattern!  But he was worth the work because he turned out great! 


 This was definitely a tough stitch.  The way the colors change throughout the piece to create the shading got confusing many times and I got off count and would have to frog and re-stitch.  I began stitching small sections at a time which helped tremendously!  It may have only been four shades of green, but it was still tough.  


I think he looks great though.  He’s got a little smile on his face and I love his snarled fingers.  I’m so very pleased with this piece and glad I had the chance to stitch it---all thanks to my awesome partner!


Here he is all framed up!  I love this frame I found! (I always struggle photographing glass--ugh)


I'm totally in love with this piece.  It was a monstrous challenge!

Friday, October 10, 2014

Halloween Countdown: Spooky Banner

Today’s Halloween craft is a banner I made for the Mini 13 Days of Halloween Swap.  My partner requested a banner which I was happy to oblige and I LOVE how this one turned out!


I tried something a little different with this one since it was getting shipped across the country and I didn’t want to take a chance with it getting damaged.  So I started each piece with a rectangle base that I cut out of a cereal box.  This gave it good weight and sturdiness.  I wrapped each piece with scrapbook paper and folded it over the edges to hide the cereal box which also gave it a crisp, clean edge.


I then spelled out ‘spooky’ by printing the word out on scrapbook paper and cutting it out using decorative edge scissors.  Then I just layered the letters over some other papers that I cut and punched out, raising it just a bit with foam for some depth. I still had some space at the bottom of each piece, so I got out my stickers, doodads and thingamabobs and created different little images along the bottom. The strung them together with some black and white cording. 


I absolutely love this banner.  It was fun to put together and think about each rectangle as both a separate piece and a part of the whole banner.  The papers and colors look great…if I must say so myself.  


Thursday, October 9, 2014

Halloween Countdown: Ghost Painting

Here is a simple project you can do with your kids that of course I saw on Pinterest...a spooky footprint ghost.


I used a 5X7 canvas that I had on hand and painted it black.  Then you just paint the bottom of your child's foot with white paint and press it onto the canvas or paper.  Then using black paint, add some eyes and a mouth.  Super simple!


I also added the word 'boo' along the bottom in glitter.  Cute!


Click the links below for more fun things you can make for Halloween using foot and hand prints.


*CANDY CORN FOOTPRINT

*FOOTPRINT BAT

*FRANKENSTEIN FOOTPRINTS AND HANDPRINTS

*FOOTPRINT SCARECROW

*HANDPRINT BLACK CAT

*HANDPRINT SPIDER


Wednesday, October 8, 2014

Halloween Countdown: Birdcage Graveyard

So I picked up a small birdcage at Michael’s, not really knowing what I was going to do with it.  I thought maybe I’d do something for the 13 Days Swap, but didn’t have a definite plan.  I played with a few things, but didn’t really like anything, so I set it aside for a bit.  Then it hit me, my partner loves miniatures, so I thought I’d create a little scene in the birdcage.   A spooky little graveyard in fact.


I started by creating a little tombstone out of polymer clay, because well—it’s not a graveyard without a tombstone right?  Then I just built up around the tombstone, adding a little bottle brush tree that I added a beaded garland to, some moss and then some little jewels thinking perhaps this is a pirate’s grave or a witch’s grave.  I also added a moon-shaped button along the back and added a bird charm to the top so it hangs down into the scene a bit.


I thought it still needed a little something, so I added a wooden candlestick to the bottom as a decorative base.  I painted it black, added a little ribbon and a button to dress it up a bit.  Then I added a little pom-pom fringe along the outside of the cage.  I think it’s a darling little scene and again I had a hard time shipping it out.


Making this, I really see the appeal of miniatures.  It was very fun creating this little scene, thinking of what to add to make a little story.  So maybe I’ll be making more small things in the future!


Sunday, October 5, 2014

Halloween Countdown: Miniatures

My partner in the mini 13 Days Swap loves miniatures.  She has a doll house and a fairy garden.  I wanted to add some Halloween decor to her miniatures so here's what I made for her.


A simple banner for her fairy garden.  I punched star shapes out of Halloween themed scrapbook paper and glued it to some string and added some skewers so she could put it in the garden. 


A little rocking chair with a Halloween pillow.  I found the rocking chair at Joann's in the clearance bin.  It was already black and I thought it was perfect! I cross stitched a small jack-o-lantern pattern and turned it into a small pillow for the chair. 


A Halloween tree.  I also found this bottlebrush tree at Joann's.  I painted it using copper and orange acrylic paint.  I then strung some buttons on a silver sparkly pipe cleaner and added it so it looked like a garland on the tree. 


Then a small wreath with a witch shoe!


These were really simple but fun projects.  I see how easy it is to fall in love with creating miniature scenes.  You can really get lost creating little scenes. 

Stay tuned for more Halloween fun!

Friday, October 3, 2014

Halloween Countdown: Jewelry

Today I’m sharing more things I made in the Mini 13 Days of Halloween Swap.  My partner is a big Universal Monsters fan so I wanted to make some jewelry based on these characters. It’s been a while since I’ve made any jewelry so it was fun to get back into it for this swap.

First up is a fun, little charm bracelet featuring all the characters from the old movies…Dracula, Frankenstein, Creature from the Black Lagoon, Bride of Frankenstein etc.


I've made jewelry like this before using the small wooden pieces that I found in the kids section at Michael's. I decoupage the images to the wood pieces. It’s a little different but I like it. Kinda fun, and if you can't wear silly fun jewelry at Halloween then when can you!


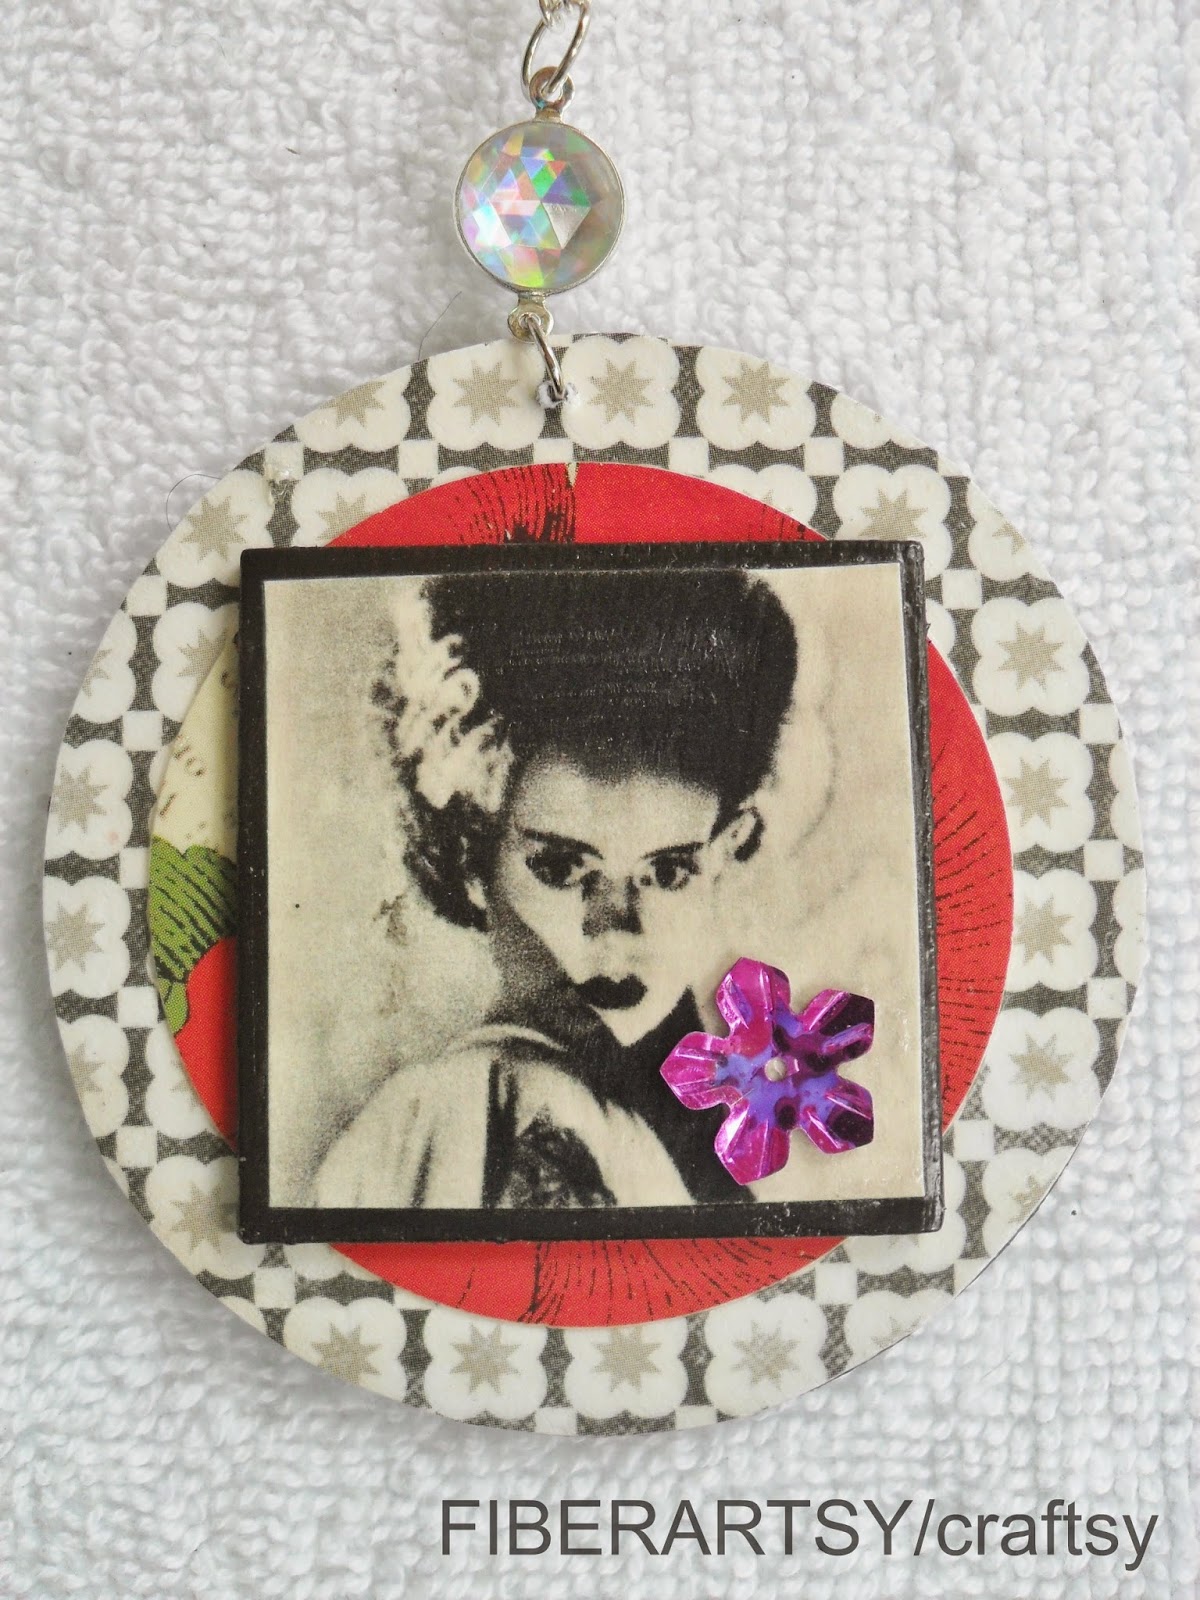
I also made a necklace featuring Bride of Frankenstein.  


I used a larger wooden piece and decoupaged the image onto it. I also used some decorative scrapbook paper.  I added some beads and that’s it! I like this necklace very much.  I would totally wear it, but alas, it had to shipped away. 


Do you wear jewelry for Halloween?

Tune in next time for more Halloween fun!